
In this guide
Written by Nic Barella
Director and Lead Photographer, Photograph My Product Ltd
I have been photographing products professionally for a long time now. Tens of thousands of items, across almost every category you can think of. Watches, skincare, pet treats, car parts, spirits, beauty tools, children's toys, industrial hardware. The products change, but the fundamentals do not.
This guide is the one I wish I could hand to every client, every business owner, and every marketing manager who asks me where to start. It covers everything: the equipment, the lighting, the different types of product imagery, what platforms actually require, how to edit properly, and how to know when it is time to stop doing it yourself and bring in professional help.
Whether you are photographing your first product on a kitchen table or managing imagery for a growing ecommerce catalogue, the principles in this guide apply. Good product photography is not about expensive gear. It is about understanding light, consistency, and what your customer needs to see before they trust your product enough to buy it.
Before you pick up the camera
Know where you are going before you start.
Creating product imagery without a clear vision of the final result is like jumping in a car and driving without knowing your destination. You might eventually get somewhere, but you will waste time, fuel, and probably end up lost.
The destination is the finished image. How will it be used? Where will it sit? What does your customer need to see? Once you have that clear in your mind, the equipment, lighting, styling, and editing are simply the route that gets you there. Every decision in this guide comes back to that principle. Start with the end in mind, then work backwards.
Why product photography matters
Your product images are doing the job that a shop assistant does in a physical store. They answer questions. They build confidence. They communicate quality. And they do all of this in a couple of seconds, often before the customer reads a single word of your product description.
When a customer lands on your product page or scrolls past your listing on Amazon, the image is the first thing that registers. If it looks sharp, well-lit, and professional, the customer stays. If it looks dark, blurry, or inconsistent, they scroll past. It really is that quick.
Why images matter
75%
of shoppers rely on product photos when making a purchase decision
Images are the primary driver, ahead of reviews and descriptions.
22%
of online returns happen because the product looked different in person
Accurate photography reduces returns directly.
2s
is roughly how long a customer spends deciding whether to stay or scroll
Your image quality shapes that decision.
Poor product photography does not just look bad. It actively costs you sales, drives up return rates, and undermines whatever else you are doing well with your branding, your pricing, or your product development. Good imagery is not a luxury. For any brand selling online, it is the foundation.
If you suspect your imagery might be holding you back, our article on ten signs you need new product photography is a useful self-check.
Types of product photography
There is no single type of product photography that works for everything. Different images serve different purposes, and most brands need a combination. Here is a breakdown of the main types and when each one earns its place.
Packshot
Clean, isolated, catalogue-ready
Lifestyle
Styled, in-context, brand storytelling

Detail / Close-up
Texture, material, craftsmanship

Flat Lay
Top-down, arranged, editorial
Packshots
The workhorse of ecommerce imagery. A packshot is a clean, isolated product image, usually on a white background. Its job is clarity: show the product exactly as it is, with no distractions. This is what populates your catalogue, your marketplace listings, and your comparison pages. If you only invest in one type of photography, start here. Read more about packshot photography.
Lifestyle photography
Lifestyle images show the product in context. A candle on a shelf. A bottle being poured. A skincare product next to a bathroom mirror. The purpose is to help the customer imagine owning and using the product. Lifestyle imagery builds brand personality and works particularly well on social media, in advertising, and on brand landing pages. Explore lifestyle photography, or read our practical guide to lifestyle product photography.
Ghost mannequin
For clothing brands, ghost mannequin photography gives garments a three-dimensional shape without showing a visible mannequin or model. The mannequin is photographed and then digitally removed in post-production, leaving the clothing looking as though it is floating with form and structure. See ghost mannequin photography.
Flat lay
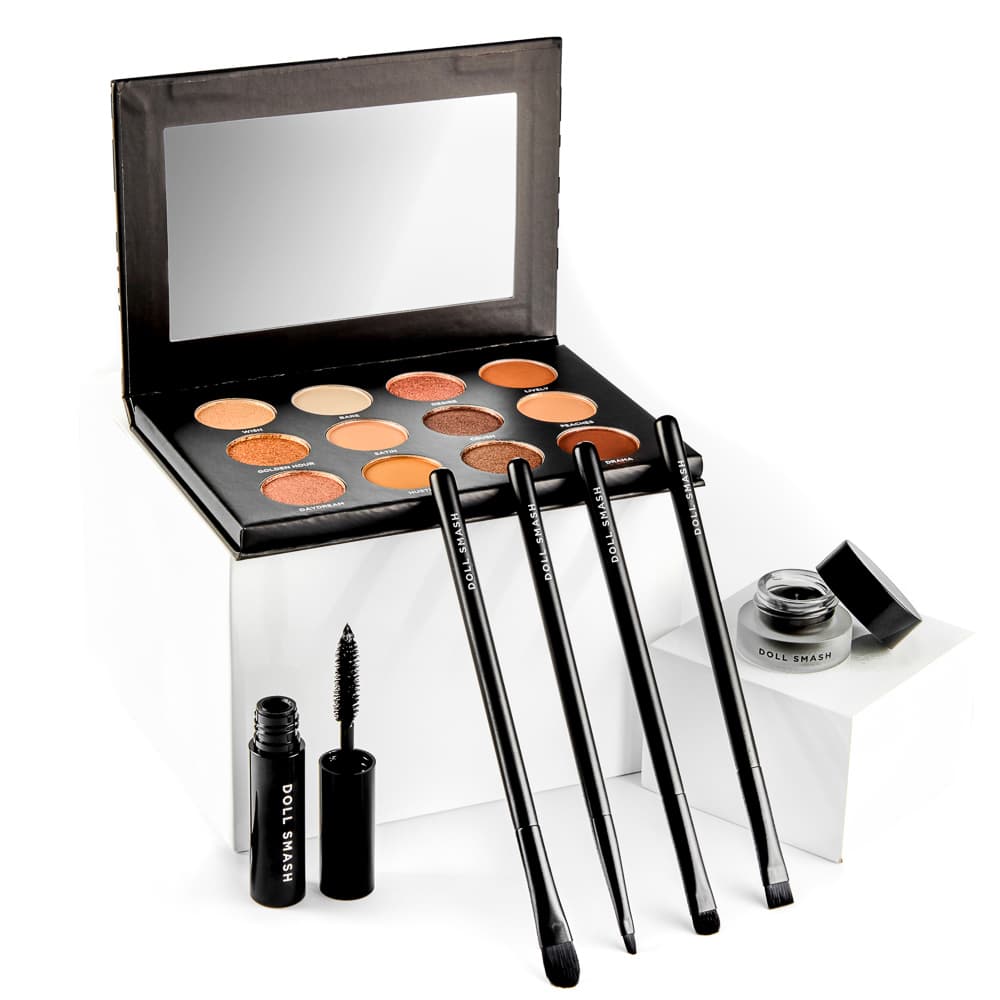
Flat lays are top-down compositions where products are arranged on a surface and photographed from directly above. They are excellent for showing collections, gift sets, and product bundles. The composition and styling take time, but the results are visually striking and very shareable. See flat lay photography.

Ghost Mannequin

Composite Imagery

On-Model
Composite imagery
Composite photography combines a studio-shot product with a digitally created or curated background. The product is photographed cleanly in the studio, then placed into a lifestyle scene in post-production. This is a cost-effective way to create lifestyle imagery without location shoots or elaborate set builds. See composite photography, or read how digital composite photography works.
Infographic images
Infographic imagery overlays key product features, dimensions, or benefits onto a photograph as graphic text and icons. These are widely used on Amazon listings and ecommerce product pages where communicating specific information quickly is essential. See infographic design.

Infographic imagery
Infographic images combine photography with graphic overlays to communicate product features, dimensions and benefits quickly. They are particularly effective on Amazon and marketplace listings where customers scan rather than read.
Hero images
Hero images are large, high-impact visuals used for website banners, campaign landing pages, and advertising. They are designed to grab attention and usually involve more creative direction, styling, and post-production than standard catalogue shots. See hero image photography.

Creative and hero imagery
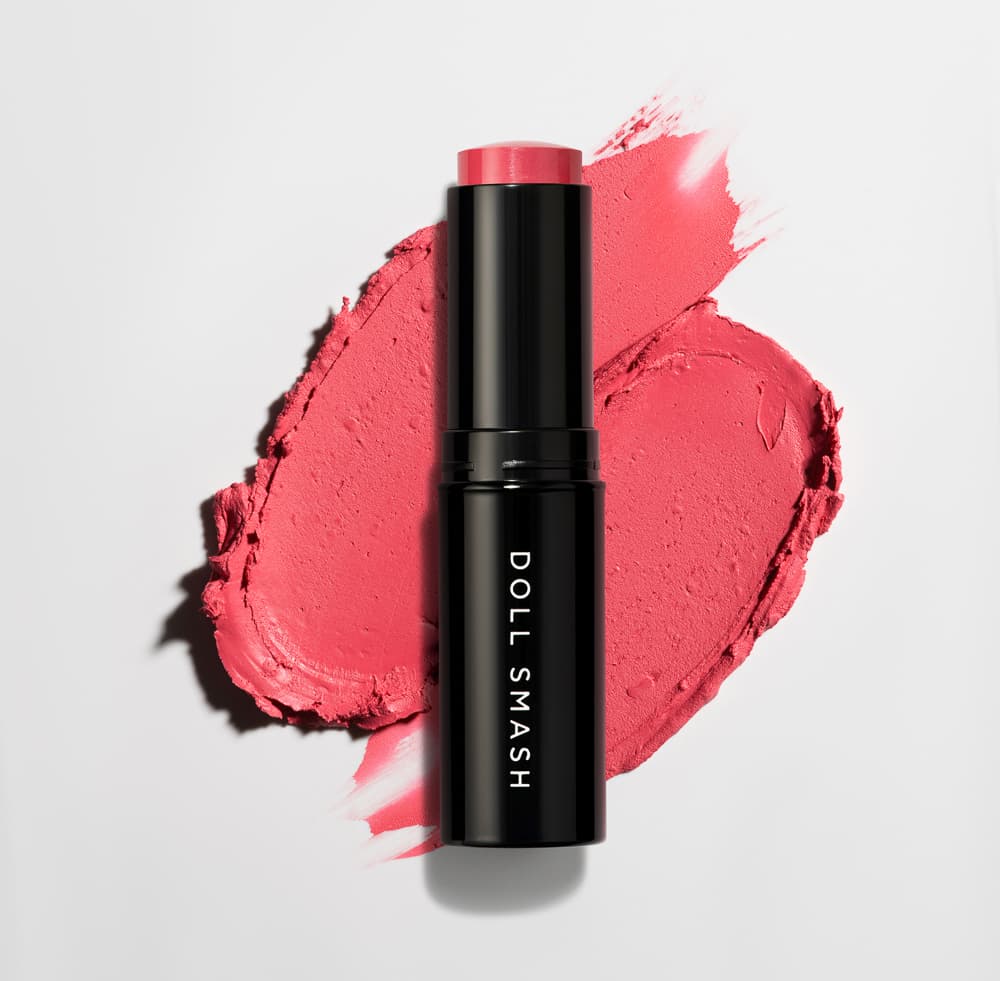
Hero and campaign images use bolder creative direction, colour, and composition to grab attention. These are the images that stop someone scrolling and are built for advertising, social media, and brand landing pages.
For a deeper comparison of the two most common styles, read our guide to packshot vs lifestyle product photography.
Essential equipment and setup
You do not need to spend thousands to start photographing products well. I have seen excellent images taken on phones, and I have seen terrible images taken on professional cameras. The gear matters, but it matters less than the light and the technique.
Camera
A modern smartphone is genuinely good enough for many product types. If you want more control, a mirrorless or DSLR camera lets you shoot in RAW format and swap lenses. But do not let the camera be the reason you delay. Start with what you have.
Tripod
Non-negotiable. Handheld shooting introduces blur and inconsistency. Even an inexpensive tripod dramatically improves sharpness and helps you maintain consistent framing across a range of products.
Background
A roll of white paper taped to a wall and draped over a table gives you a seamless white sweep. For smaller items, a pop-up lightbox works well. Avoid textured surfaces and busy backgrounds unless you are deliberately creating a styled scene.
Lighting
Start with a large window. If that is not available or consistent enough, a pair of softbox lights gives you reliable, repeatable results. The quality of your light matters more than the quality of your camera.
Reflector
A white card or foam board placed opposite your light source bounces light back onto the shadow side of the product. This simple addition dramatically reduces harsh shadows and evens out the light.
Editing software
Adobe Lightroom is the industry standard. Free alternatives like Snapseed (mobile) or Pixlr (browser-based) are perfectly good for basic adjustments. The key tasks are white balance correction, background cleanup, and consistent cropping.
Practical tip
A phone with good lighting will always produce better results than an expensive camera with bad lighting. If you are on a budget, invest in light before you invest in a camera body.
Lighting fundamentals
If there is one thing I could teach every business owner about product photography, it would be this: lighting is everything. You can fix composition in post. You can crop and straighten. But you cannot fix bad light after the shot is taken. Not properly.
Hard light vs soft light
Hard light creates sharp, defined shadows. Think direct sun on a clear day. Soft light wraps around the product gently and reduces shadows. Think overcast sky or light through a diffusion panel. For most product photography, soft light is what you want. It is more forgiving, more flattering, and easier to control.
Natural light
A large window on an overcast day gives you beautiful, soft, directional light. Position your product next to the window so the light falls across it from one side. Place a white card or reflector on the opposite side to fill in the shadows. This is genuinely the simplest way to get good results without any specialised equipment.

Lighting setup
A standard two-light setup with key light, fill light, reflector and camera. This configuration works for the majority of product photography and can be adapted to most product sizes.
Studio lighting
When you need consistent results regardless of weather or time of day, studio lights are essential. A basic two-light setup with softboxes covers most product photography needs. The key light (your main light source) sits to one side, slightly above the product. The fill light sits on the opposite side at a lower intensity, softening the shadows created by the key light.
Tricky materials
Some products fight the light. Glass, polished metal, chrome, and transparent plastics all create reflections that can make an image look messy. The trick is to control what the product reflects. Use large, soft light sources. Surround the product with white or black cards to shape the reflections deliberately. Tent the product inside diffusion material if needed. And expect to spend more time on these shots than on simpler surfaces.
You cannot fix bad light after the shot is taken. You can fix almost everything else. Invest your time in getting the light right before you press the shutter.
Nic Barella, Studio Director
How to shoot product photography: step by step
Professional studios follow a repeatable process for every shoot. You should too. Breaking the shoot into clear steps removes guesswork and makes your results more consistent.
Shoot day checklist
Prepare the product
Clean every surface. Remove dust, fingerprints, and stickers. Steam clothing. Tighten labels. The camera sees everything you missed.
Set up your background and lighting
Position your sweep, place your lights, and set up a reflector. Take a test shot and check the exposure on a proper screen, not just the camera's LCD.
Lock your camera settings
Use a low ISO (100 or 200) for clean images. Set a small aperture (f/8 to f/11) for sharp focus across the whole product. Set your white balance to match your light source.
Shoot your hero angle first
Start with the front-on, eye-level shot. This is your main listing image. Get this perfect before moving on to supporting angles.
Capture multiple angles and details
Rotate the product or move the camera to capture 45-degree views, side profiles, the back, the base, and any close-up details that matter. Take more than you think you need.
Review on a proper screen
Do not trust the camera's small display. If you can tether your camera to a laptop, do it. You will spot focus issues, glare, and dust while you are still set up to fix them.

Camera angles
The five standard product photography angles. Most ecommerce listings need at least the first three. Detail shots are essential for products where material quality, texture, or craftsmanship matter.
Shooting for consistency
If you are photographing a range of products, consistency is more important than individual brilliance. Keep the same lighting, the same camera height, the same framing, and the same background for every product in the set. When a customer browses your catalogue, the images should feel like they belong together. Inconsistency makes a brand look disorganised, even if each individual image is decent in isolation.
Why consistency matters
When every product in a range is shot with the same light, angles and framing, the catalogue builds trust

A consistent product range photographed at PMP. Every item matches in lighting, background, angle and crop. This level of consistency only comes from a controlled, repeatable studio process.
Post-production and retouching
Taking the photograph is half the job. The other half happens in editing. Every professional product image goes through post-production before it is used, and yours should too. Retouching is not about making the product look like something it is not. It is about making the photograph represent the product accurately and consistently.
Background cleanup
Make your white background truly white (RGB 255, 255, 255). Remove any shadows, marks, or unevenness. This is essential for marketplace compliance and catalogue consistency.
Colour correction
Ensure the colour on screen matches the real product. A yellow cast from warm lighting or a blue cast from daylight both misrepresent the product and lead to returns.
Dust and blemish removal
Remove dust spots, scratches, fingerprints, and any imperfections that are not part of the actual product. This is standard practice, not deception.
Consistent cropping
Crop every image to the same dimensions and the same relative product size. When your catalogue page loads, every product should sit at the same visual weight.

The finish matters
Retouching is not about making the product look better than it is. It is about making the photograph represent the product properly.
Over-editing damages trust. If a customer receives something that looks noticeably different from the image, you have a returns problem and a credibility problem.
For more on why cutting corners in post-production backfires, read the high cost of rushing your product photography.
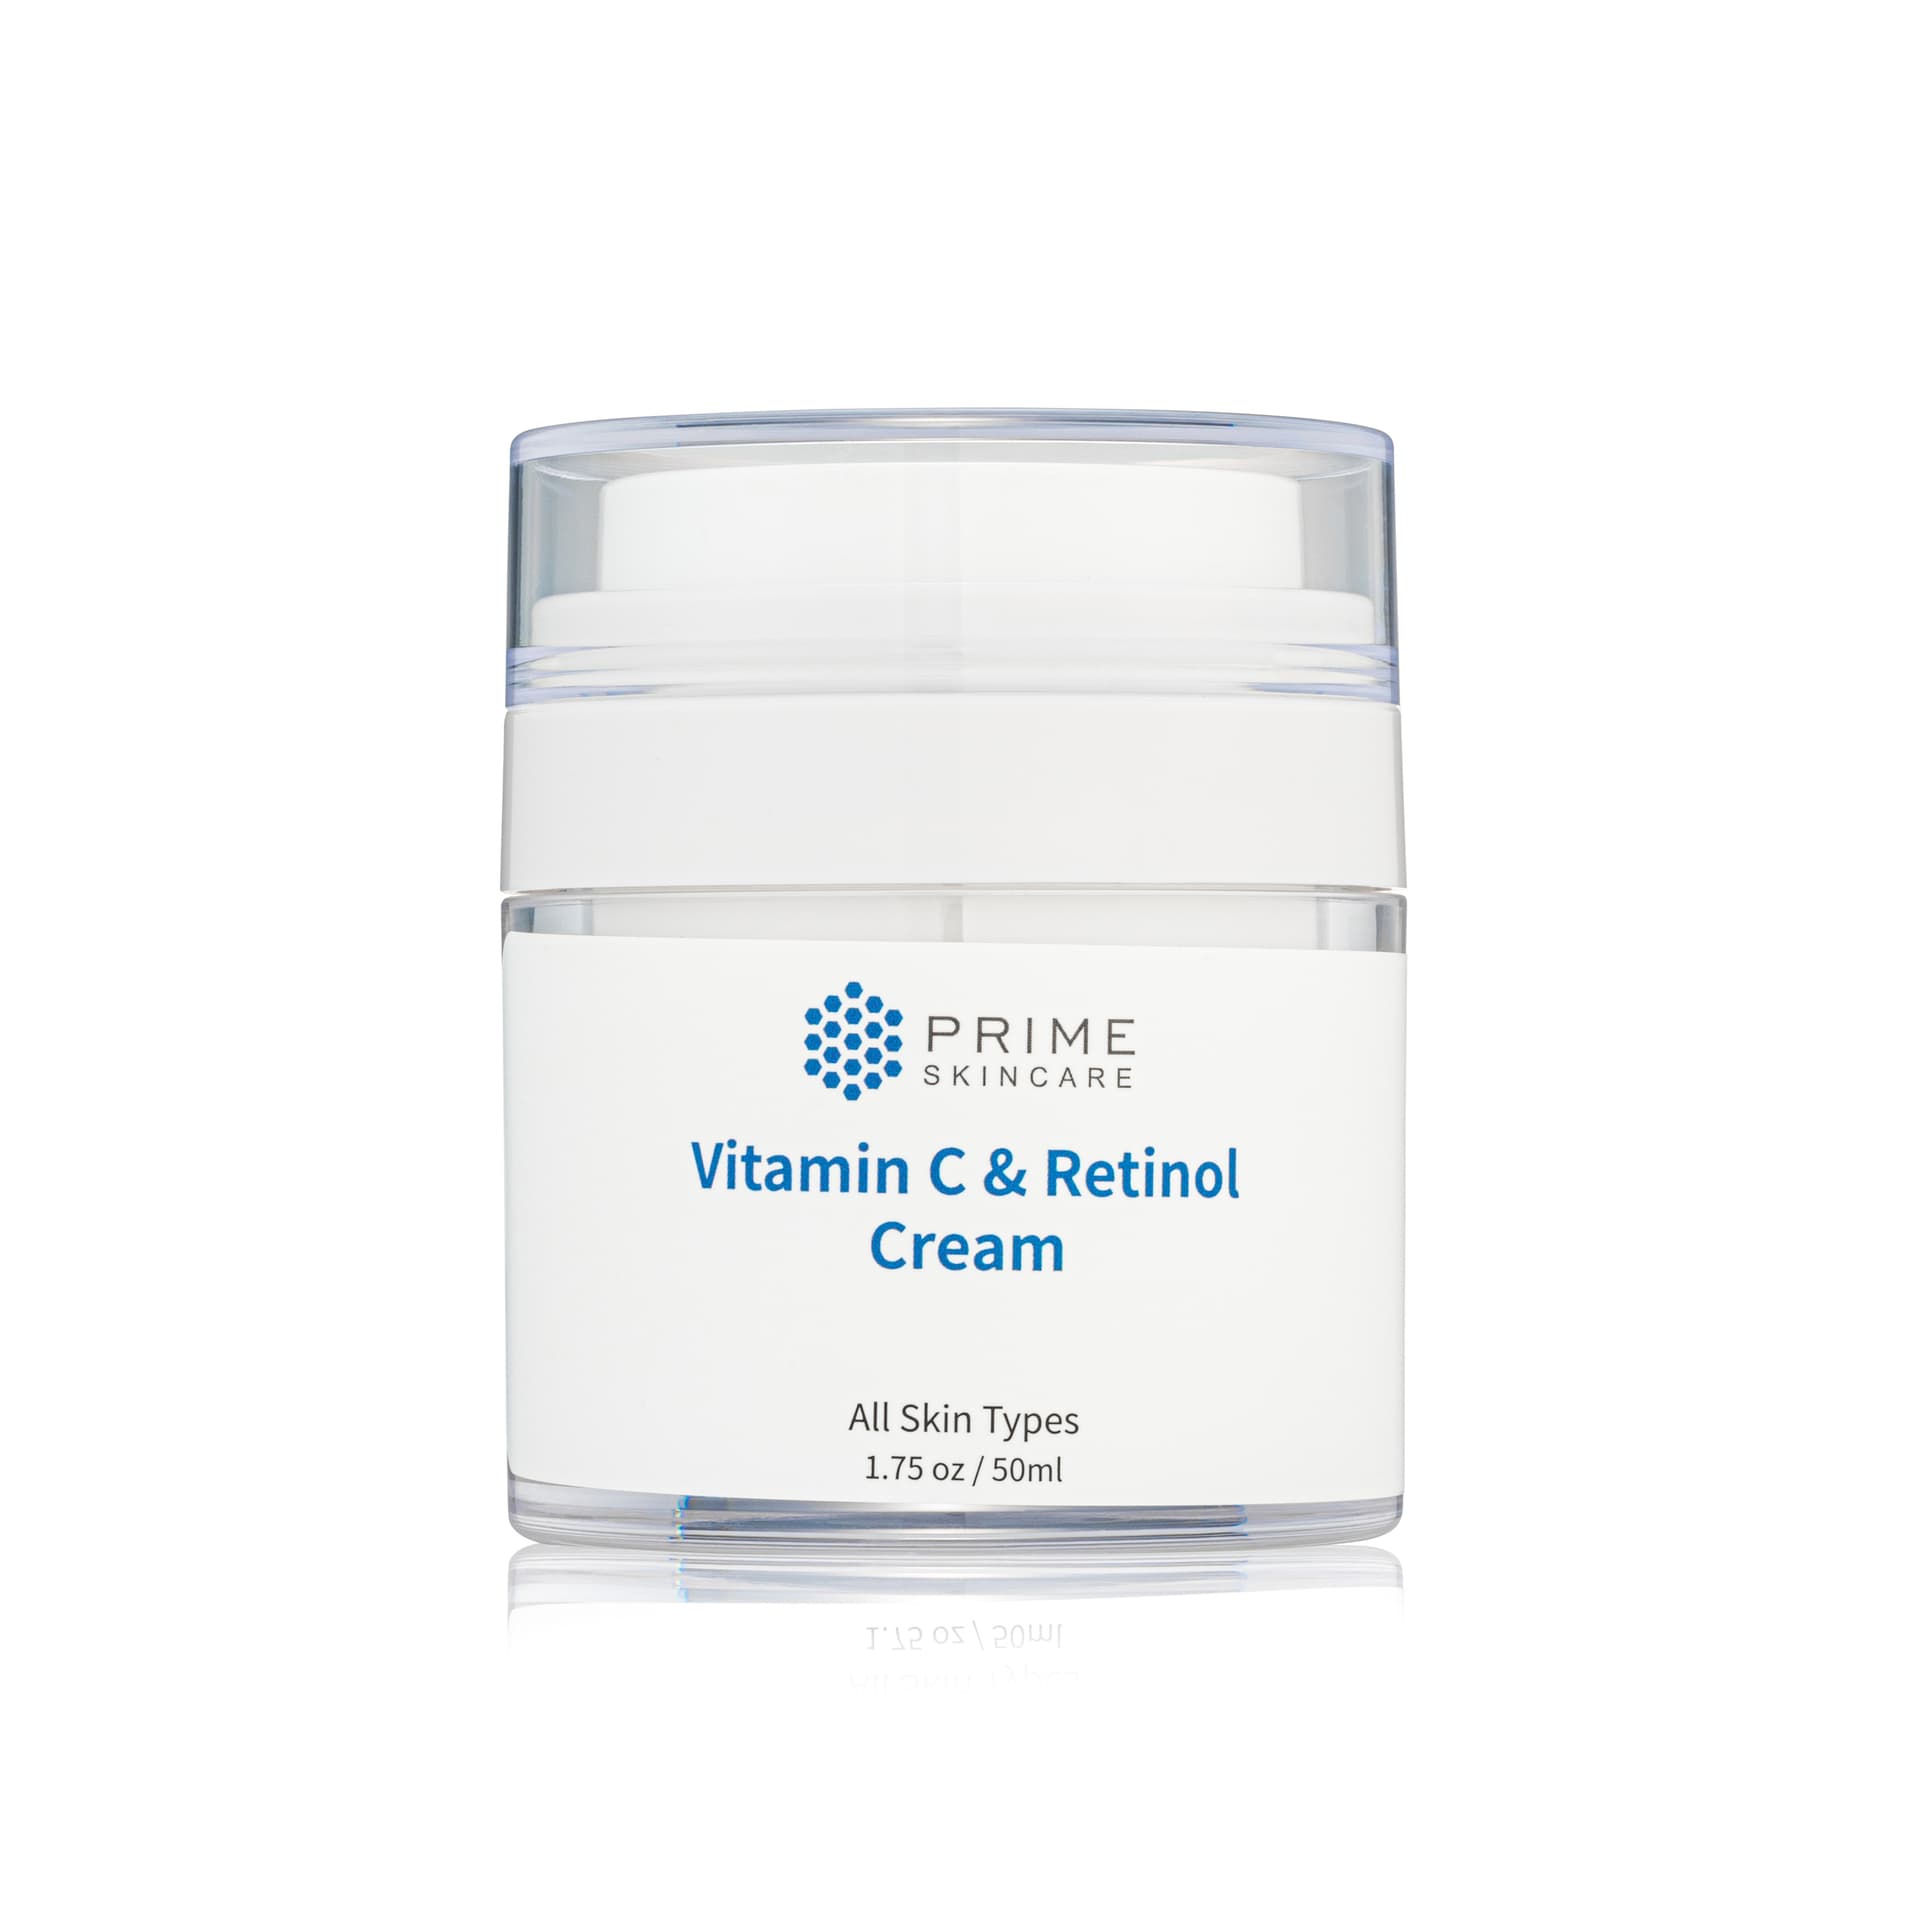
A clean, well-retouched packshot. The product looks exactly as it does in real life, but the image has been finished professionally: clean background, accurate colour, no dust, consistent crop.
See the process in action
Retouching is one of those things that is easier to appreciate when you can watch it happen. These two time-lapse videos from our studio show the full retouching workflow from start to finish.
Jewellery retouching
40 minutes of detailed jewellery retouching condensed into 4 minutes. Watch the full process: focus stacking, precision cutouts, metal retouching, colour fills, shadow layering and final adjustments.
Clothing retouching
The clothing retouching process from our studio. See how garment images are cleaned up, colour-corrected, and finished to a professional standard ready for ecommerce.
Image specifications for ecommerce platforms
Each platform has its own rules. Getting these wrong can mean rejected listings, poor image quality on the page, or missed conversion opportunities. Here is what the major platforms require.
Amazon
- Main image: Pure white background (RGB 255, 255, 255)
- Minimum: 1000px on longest side (2000px+ recommended)
- Product fill: At least 85% of the frame
- Format: JPEG, PNG, TIFF or GIF
- No text, logos or watermarks on main image
Shopify
- Recommended: 2048 x 2048px square
- Aspect ratio: Square (1:1) is most common
- Max file size: 20MB per image
- Format: JPEG, PNG, GIF, WebP
- Alt text: Always add descriptive alt text
General best practice
- File size: Under 100KB for web pages
- Format: WebP for speed, JPEG for compatibility
- Naming: Descriptive filenames, not DSC_001.jpg
- Alt text: Describe the product, not "image of"
- Consistency: Same dimensions across your catalogue

Marketplace imagery
A typical Amazon image set includes a compliant hero image, supporting product angles, infographic overlays, and often a lifestyle image. Getting this right is essential for conversion on the platform.
For Amazon sellers specifically, we have a detailed guide covering Amazon product photography requirements and best practice for listings that convert.
The role of AI in product photography
AI tools have become genuinely useful in parts of the product photography workflow. I use them in our studio. But they are tools, not replacements, and it is worth being honest about where they help, where they fall short, and where they could become a commercial risk for brands that rely on them too heavily.
Where AI adds real value
- Background generation for studio-shot products
- Concepting and mood exploration before committing to a full shoot
- Upscaling lower-resolution images
- Speeding up background removal
- Creating seasonal scene variations around a core product shot
Where it still falls short
- Accurate product representation (colours, materials, labels)
- Consistency across a full product range
- Understanding brand positioning and audience expectations
- Replacing a well-lit, properly captured photograph
- Knowing when something looks "off" commercially
The source photograph still matters more than anything. An AI-generated background looks convincing when the product sitting in it was photographed properly. It looks unconvincing when the lighting, perspective, or quality of the product capture does not hold up.
Why major brands are cautious about AI imagery
Brand protection
There is a reason that brands like Marks & Spencer, Gucci, and other premium retailers have not switched to AI-generated product imagery. For brands of that size and reputation, imagery is not just a visual asset. It is a trust signal. Every product image represents a promise to the customer about what they are buying, and the commercial consequences of getting that wrong are serious.
These brands invest heavily in professional photography because brand protection matters more than production speed. When your imagery represents your brand to millions of customers, you cannot afford for it to contain inaccuracies, inconsistencies, or visual artefacts that undermine confidence.
The hidden metadata problem: SynthID and invisible watermarking
This is something most business owners are not yet aware of, but it is worth understanding now. AI-generated images do not just look like AI images. They increasingly are identifiable as AI images, even when the human eye cannot tell the difference.
Google DeepMind has developed a technology called SynthID that embeds invisible watermarks directly into the pixel-level data of AI-generated images. These markers are imperceptible to the human eye, but they are detectable by software. The watermark survives cropping, resizing, compression, and most common image edits. It is designed to be permanent and practically irremovable.
Worth knowing
AI-generated images increasingly carry invisible, permanent metadata that identifies them as synthetic content.
Technologies like Google DeepMind's SynthID embed watermarks at the pixel level. They cannot be seen by the human eye, but they can be read by software. This matters because it means the provenance of every AI-generated image is traceable, whether the brand using it realises that or not.
The future risk for brands using AI imagery
Right now, most ecommerce platforms and marketplaces do not actively penalise AI-generated imagery. But the direction of travel is clear. As detection tools become standard and consumers become more aware, there is a growing possibility that platforms could begin distinguishing between real photography and synthetic content, potentially giving prominence to verified, human-created imagery.
For a small brand using AI backgrounds on a handful of lifestyle images, the risk is probably manageable. But for brands building their entire visual identity on AI-generated content, the consequences could be significant. If marketplaces, search engines, or social platforms start flagging or downranking synthetic imagery, any brand that has built its catalogue on AI-generated visuals could find itself exposed.
This is not about being anti-technology. It is about understanding the difference between using AI as a tool in a controlled workflow and relying on it as a substitute for real photography.
Digital composite lifestyle: the human-led alternative
The alternative
Digital composite lifestyle photography starts with a real photograph, not a prompt.
For brands that want lifestyle-style imagery without full location shoots, there is a middle ground that does not carry the same risk. Digital composite lifestyle photography starts with a real, professionally photographed product. That product is then placed into a curated or designed scene using compositing techniques led by a human retoucher.
The product is always photographed. The scene is built or selected with real creative direction. The result is a lifestyle image that looks natural, protects brand integrity, and does not carry AI metadata. Read more about how digital composite photography works and when it is the smarter choice.
A digital composite lifestyle image from our studio. The product is photographed professionally, then placed into a designed scene by a human retoucher. No AI metadata, no synthetic content.
The brands that will be best protected are the ones building their image libraries on real photography now, using AI as a tool where it genuinely helps, rather than as a shortcut that could become a liability.
Nic Barella, Studio Director
For a detailed comparison of AI and traditional approaches, read our guide to AI product photography vs traditional photography, or hybrid product imagery: photography meets AI.
Common product photography mistakes
After years of looking at product images, both our own and the imagery that clients bring to us when they are ready for a change, these are the mistakes I see most often.
Mistakes that cost sales
Inconsistent lighting across a range
One product looks warm and soft, the next looks cold and flat. Customers notice, even if they cannot articulate why.
Wrong white balance
A yellow or blue colour cast makes the product look different from reality. This is one of the top causes of returns.
Cluttered backgrounds
A messy or distracting background pulls attention away from the product. Keep it simple unless you are deliberately creating a styled scene.
Over-editing
Too much saturation, contrast, or skin smoothing makes images look unrealistic. The goal is accuracy, not Instagram filters.
Not enough angles
One photograph is not enough. Customers want to see the product from multiple sides, close up, and in context. Shoot more than you think you need.
Ignoring platform specs
Uploading images that are the wrong size, wrong format, or non-compliant with marketplace rules. This gets listings rejected or makes products look unprofessional.
Rushing the shoot
Trying to photograph everything in one frantic session without proper planning. The results always show it. Read more on why rushing costs more than it saves.
If several of these sound familiar, you are not alone. Our guide to making time for product photography covers how to plan a shoot properly so these problems do not creep in.
DIY vs hiring a professional studio
I run a product photography studio, so you might expect me to say everyone should hire a professional. I am not going to say that. The honest answer is that it depends on where you are and what you need.
Knowing when to switch
DIY works until it doesn't. The tipping point is usually consistency.
DIY photography works well when you are starting out, when your catalogue is small, and when your products are relatively simple. A good phone, decent light, and a white background can take you a long way.
The tipping point usually arrives when you need consistency across a growing range, when you are selling on marketplaces with strict image requirements, or when you simply cannot invest any more of your own time into shooting and editing. That is when professional photography stops being an expense and starts being an investment.
When a growing range needs to look cohesive across every listing, that is usually the point where a studio relationship pays for itself.
When DIY makes sense
- You are just launching and testing a product
- Your catalogue is small and your products are simple
- You have more time than budget
- You are willing to learn lighting and editing basics
- You need social content quickly and informally
When a studio earns its cost
- You are growing and launching new products regularly
- You sell across multiple platforms with different requirements
- Consistency across your range matters commercially
- Your products are complex (reflective, transparent, small)
- Your time is worth more spent on the business than on photography
For a deeper analysis, read our DIY vs professional product photography comparison. If you are thinking about costs, our product photography pricing guide covers what to expect in the UK. And if you decide to work with a studio, our guide to writing a photography brief will help you get the best results from the relationship.
Making your product images work harder
Product photography is a skill that improves with practice. Whether you are shooting on a phone in your spare room or working with a professional studio, the principles remain the same: good light, clean backgrounds, consistent framing, and images that represent your product honestly.
If you take one thing from this guide, let it be this: your product images are not just illustrations. They are your sales team. They build trust, answer questions, reduce returns, and shape every first impression your brand makes online. Investing in getting them right, whether that means improving your DIY setup or working with a studio, is one of the most commercially valuable things you can do.
Good product photography is not about expensive equipment. It is about understanding light, consistency, and what your customer needs to see before they trust your product enough to buy it.
Nic Barella, Studio Director
If you reach a point where you want professional support, we are always happy to have a conversation about what would work best for your brand. You can browse our ecommerce photography packages, check our pricing, or send us a brief and we will come back to you with honest advice.
We photograph products from our studio in York and work with brands across the UK, either in person or by post. The goal is always the same: images that do justice to the product and help it sell.
Frequently asked questions
What equipment do I need for product photography?
At a minimum, you need a camera (a modern smartphone works for many products), a tripod or stable surface, a clean white background such as a paper sweep, and a good light source. Natural window light is perfectly adequate when starting out. As your needs grow, adding a second light, a reflector, and a simple editing tool will improve your results significantly.
What is the best background for product photography?
A plain white background is the most versatile starting point. It works across all ecommerce platforms, meets Amazon compliance requirements, and keeps the focus on the product. A rolled paper sweep taped to a wall and draped over a table creates a seamless white background without a visible horizon line. Grey and black backgrounds work well for certain products, particularly premium items where contrast is important.
How do I photograph reflective or glass products?
Reflective and transparent products are among the hardest to photograph well. The key is to control what the product reflects. Use large, soft light sources positioned at wider angles, and place white or black cards around the product to shape the reflections deliberately. Avoid direct flash. Many photographers tent the product inside a diffusion panel to wrap soft, even light around it.
What image size does Amazon require for product listings?
Amazon requires a minimum of 1000 pixels on the longest side for zoom functionality, but recommends 2000 pixels or above for the best customer experience. The main image must have a pure white background (RGB 255, 255, 255), and the product should fill at least 85 percent of the frame. File formats accepted include JPEG, PNG, TIFF and GIF.
Is it better to use natural light or studio lighting for products?
Natural light is free, flattering, and a brilliant starting point. It works especially well for lifestyle and styled shots. Studio lighting gives you full control and consistency, which matters when you are shooting a range of products over time and need every image to match. Many professionals use a combination of both depending on the brief.
How much does professional product photography cost in the UK?
Costs vary depending on the brief. Simple packshots might start from a few pounds per image for larger batches. Amazon image sets, lifestyle photography, and styled shoots sit higher because they involve more planning, styling, and post-production. Our pricing guide covers the detail for different types of work.
What is the difference between a packshot and lifestyle photography?
A packshot is a clean, isolated product image, usually on a white background, designed for clarity and comparison. Lifestyle photography shows the product in context, often styled with props, models, or a setting that communicates mood and use. Most ecommerce brands benefit from both, with packshots for catalogue listings and lifestyle images for brand building and social content.
Can I use my phone for product photography?
Yes. Modern smartphones produce excellent results for many product types, particularly when paired with good lighting and a clean background. The main advantages of a dedicated camera are shooting in RAW format for better editing flexibility and having interchangeable lenses for more control over depth of field. But a phone with good light and a steady hand will outperform an expensive camera with poor lighting every time.

